Raspberry Pi is a fully functional computer residing on a printed circuit board less than four inches long. Designed as an educational tool, it has found widespread favor with hobbyists and professionals alike for a dazzling array of uses.
Starting with Screens 5.3, WayVNC is now supported via RSA-AES authentication. You can also use this authentication method with previous versions of Raspberry Pi where RealVNC server is installed.
In your connection settings for your Raspberry Pi, simply select User (RSA-AES) as the Authentication Method.
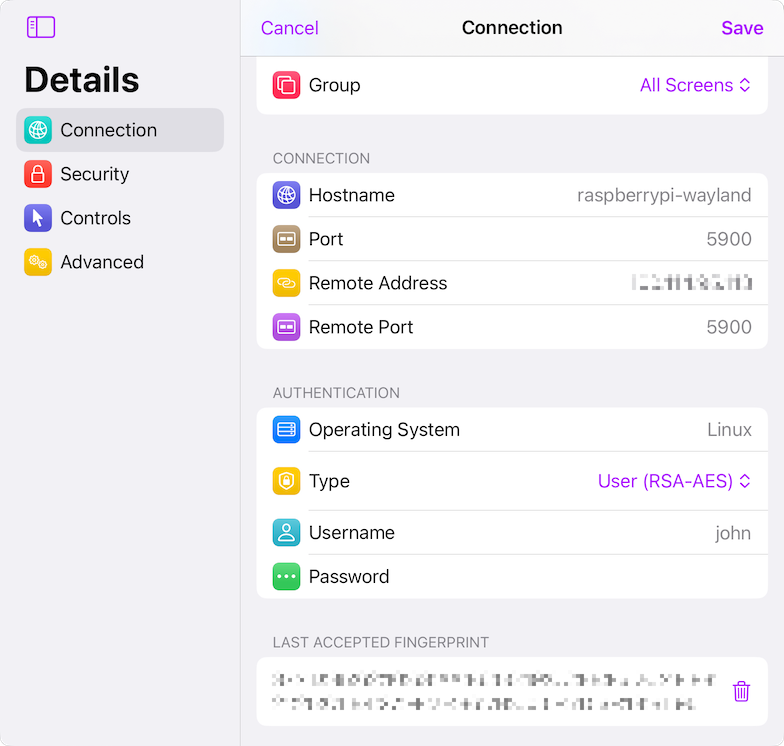
Enter your username and password or leave those blank if you want to be prompted during the connection process.
Using RSA-AES Authentication with WayVNC
By default, RSA-AES should already be enabled on your Raspberry Pi. If that's not the case, please refer to your Raspberry Pi version documentation for instructions.
Using RSA-AES Authentication with RealVNC
If you're using the RealVNC server on your Raspberry Pi, you need to configure it to allow user authentication:
- Boot into the desktop on your Raspberry Pi. If the desktop isn’t a viable option, start VNC Server from the command line.
- Navigate to Menu → Preferences → Raspberry Pi Configuration → Interfaces and confirm that VNC is enabled.
- Open VNC Server’s Options window.
- Under Security, confirm that Authentication is set to UNIX password and that Encryption is set to either Prefer On or Always On.
- Under Users and Permissions, confirm that the group for your user or your user is allowed to receive incoming connections.
- Double-click the VNC icon on your taskbar to open the VNC Server dialog and make a note of the IP address.
Using a VNC Password with RealVNC
If your version of Raspberry Pi is using RealVNC and you wish to use a VNC password instead, follow these instructions:
- Boot into the desktop on your Raspberry Pi. If the desktop isn’t a viable option, start VNC Server from the command line.
- Navigate to Menu → Preferences → Raspberry Pi Configuration → Interfaces and confirm that VNC is enabled.
- Open VNC Server’s Options window.
- Under Security, confirm that Authentication is set to VNC Password and that Encryption is set to Prefer On.
- Under Users and Permissions, confirm that the Standard User is allowed to receive incoming connections and that a password is set for the user account.
- When setting a password, you will need to enable "Allow connections from legacy VNC Viewer users" if that option is shown.
- Double-click the VNC icon on your taskbar to open the VNC Server dialog and make a note of the IP address.
For more information about using Raspberry Pi’s on-board VNC software, see RealVNC’s guide.
Configure Raspberry Pi’s SSH Server
You will find more details here in order to learn how to enable secure connections on your Raspberry Pi.
Making your Computer Accessible Remotely
If you'd like to connect to your computer remotely, we recommend using Tailscale. You'll find detailed instructions in this article.
Selecting a Display
To select a particular display on your computer, you need to specify a different port number. You'll find more details in this article.
Configure Screens
Unless you choose to use Tailscale, you'll need to create a new custom connection to connect to your Raspberry Pi.
If you have configured Tailscale, your Raspberry Pi should automatically appear and be accessible from the Tailscale section in Screens 5.