To prepare your Mac for remote access with Screens, follow the steps below.
Most users only need to enable Screen Sharing to get started.
1. Enable Screen Sharing
We recommend using Screen Sharing for most setups. It’s the simplest way to remotely access your Mac with Screens.
On the Mac you'll be connecting to:
- Click here to open the Sharing settings.
- Turn on Screen Sharing.
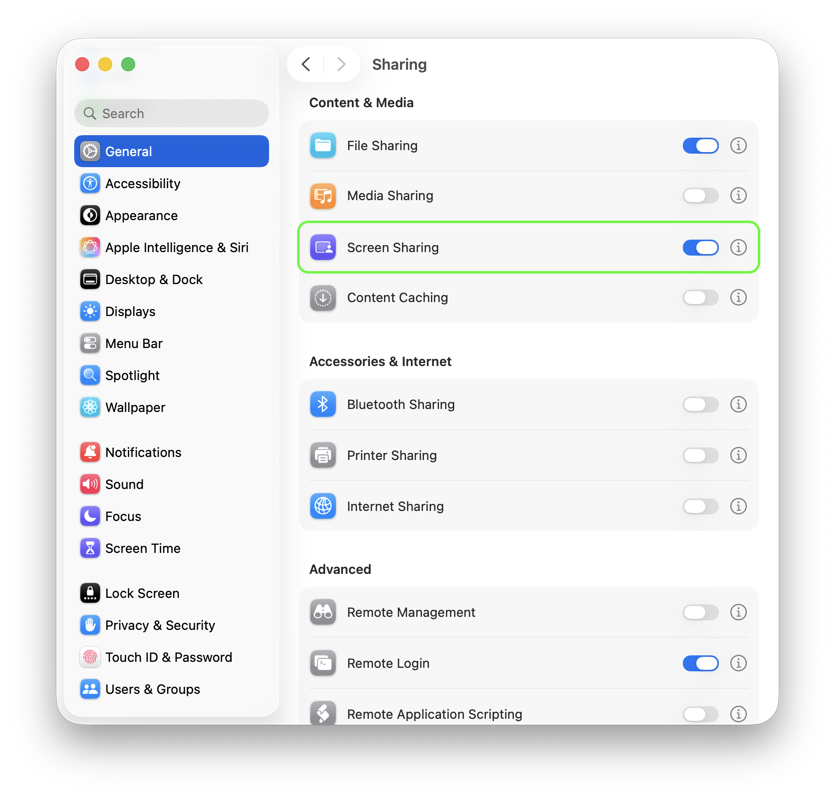
- Click the ⓘ button next to Screen Sharing.
-
Under Allow access for, select All users.
If you prefer to limit access, choose Only these users and make sure your macOS user account is included.
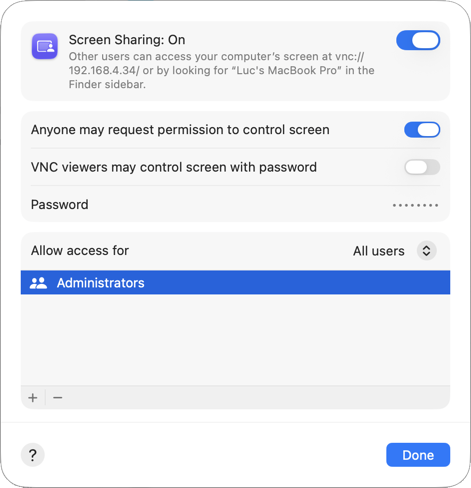
- Optionally enable Anyone may request permission to control screen if you want to allow connection requests from guest users.
Want to use Curtain Mode?
Curtain Mode requires Remote Management instead of Screen Sharing. Most users do not need this. You can find setup instructions here.
2. Enable Secure Connections (Optional)
Screens can use SSH to create secure encrypted connections to your Mac.
On the Mac you'll be connecting to:
- Click here to open the Sharing settings.
- Turn on Remote Login.
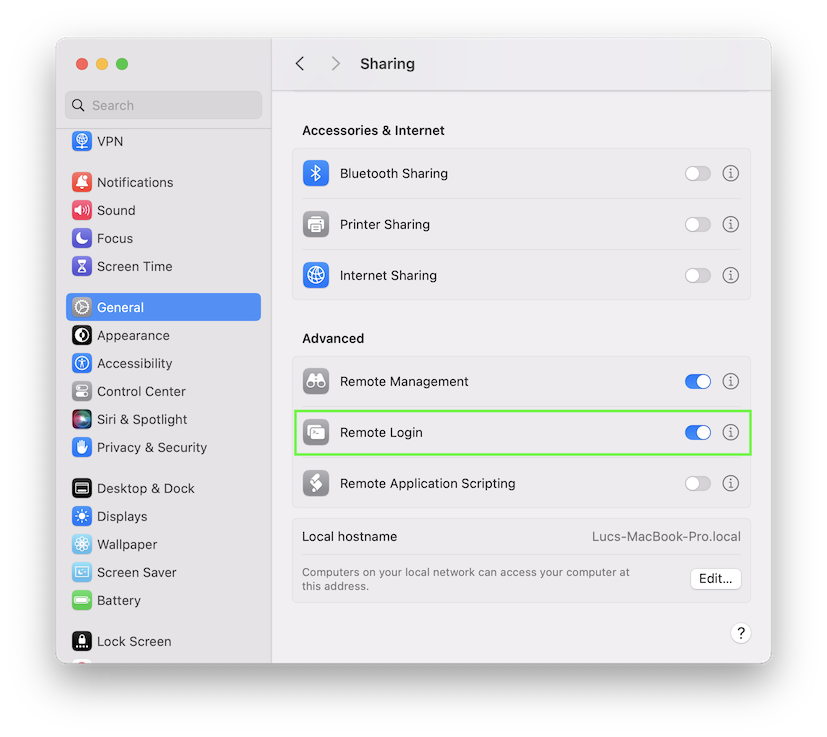
- Click the ⓘ button next to Remote Login.
-
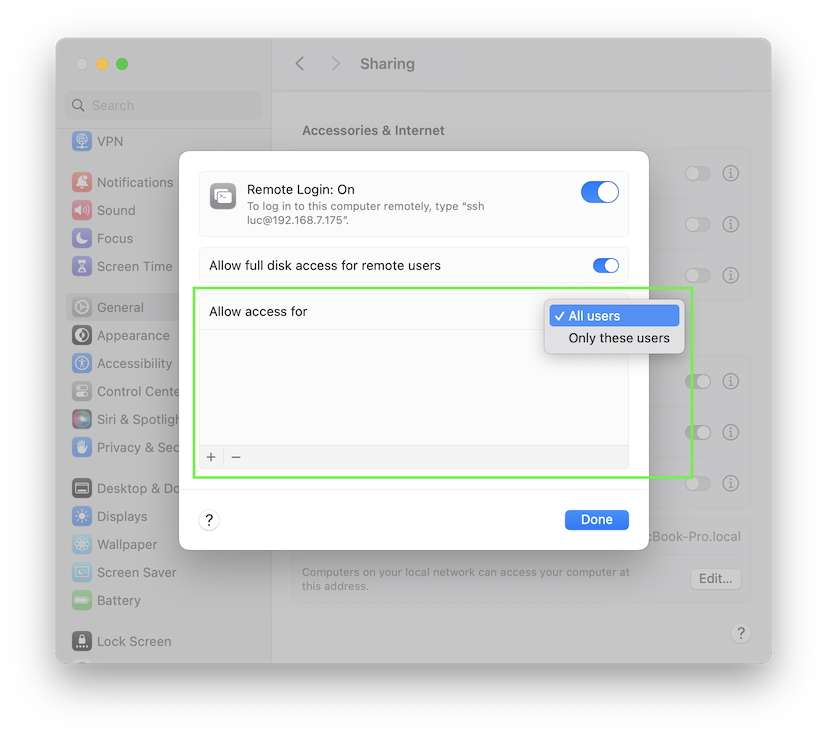
Under Allow access for, select All users.
If you prefer to limit access, choose Only these users and make sure your macOS user account is included.
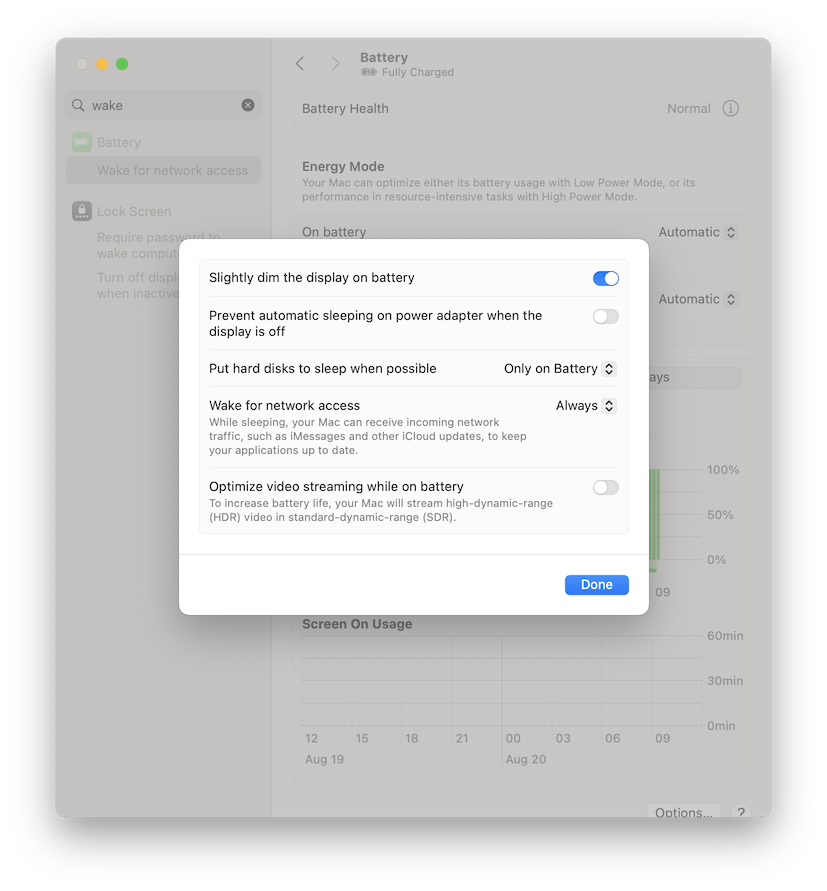
3. Enable Wake for Network Access
This allows your Mac to respond to incoming connections while asleep.
macOS 13 Ventura or later
- On the Mac you'll be connecting to, click here to open the Energy settings.
- Select Battery or Power Adapter, depending on your Mac.
- Click Options…
- Set Wake for network access to Always.
macOS 12 Monterey or earlier
- On the Mac you'll be connecting to, click here to open the Energy settings.
- Open Energy Saver or Battery.
- If available, select Power Adapter.
- Enable Wake for network access.
Important:
If you're connecting to a MacBook, make sure it's plugged into a power source. Some MacBooks may not wake for remote access while running on battery power.
4. Enable Remote Access Over the Internet
To access your Mac remotely while away from home or work, you can use:
- Screens Connect (recommended for most users)
- Tailscale
- NordVPN Meshnet
5. Connect to Your Mac
Your Mac is now ready for remote access with Screens.
Learn how to create your first connection here.