Screens Connect is a free utility that makes your Windows PC reachable remotely so you can connect to using Screens for iOS, Mac, and Vision Pro.
Step 1: Run the installer
Download the latest version of Screens Connect.
Open the downloaded file.
Click Next.
Specify where Screens Connect files should be installed.
Specify the Start Menu folder in which Screens Connect will be listed.
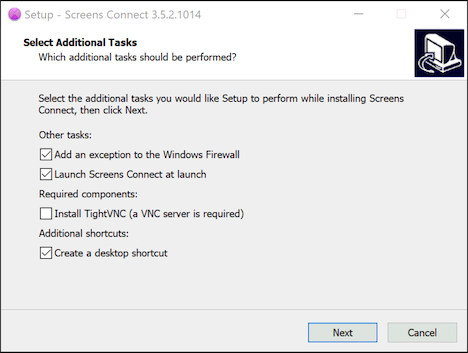
Additional Installation Tasks
Add an exception to the Windows firewall: Activate this option to instruct the Windows firewall to allow incoming Screens connections.
Launch Screens Connect at launch: To ensure that your Windows PC is always accessible when you need to connect with Screens, enable this option.
Install TightVNC: Screens requires that a VNC server is installed and running on your PC. If you already have a VNC server installed, you may deselect this option. Otherwise, select this option to install TightVNC.
Click Install to begin the installation process. (If you elected to install TightVNC and/or freeSSHd, it/they will be installed as part of this process. See below for walk-throughs.)
Installing TightVNC
When the Welcome window appears, click Next.
Read the software licence accompanying the application, and tick the box to accept the licence terms.
Choose your preferred installation type: Typical, Custom, or Complete. For our purposes, the Typical option is sufficient.
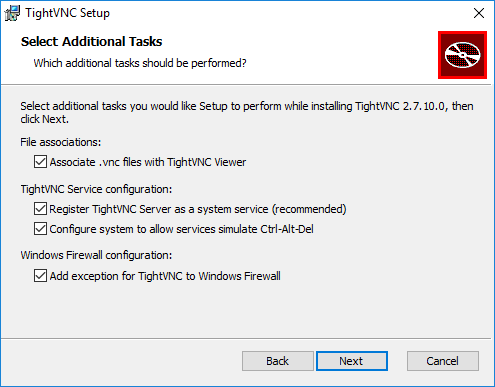
Enable Register TightVNC Server as a system service.
Enable Configure system to allow services to simulate Ctrl-Alt-Del.
Enable Add exception for TightVNC to Windows Firewall.
Click Install to begin the installation process.
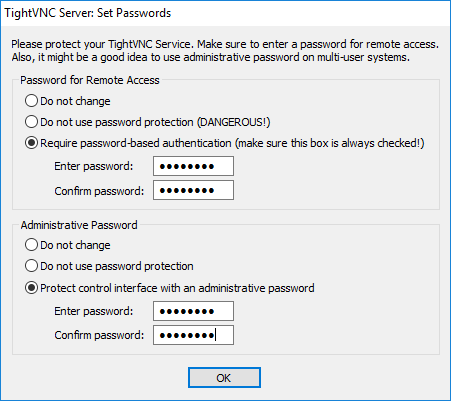
Important: As part of the installation process, set passwords for remote access and for the admin interface.
Click Finish to wrap things up.
Once installation is complete, launch Screens Connect.
Step 2: Configuring Screens Connect
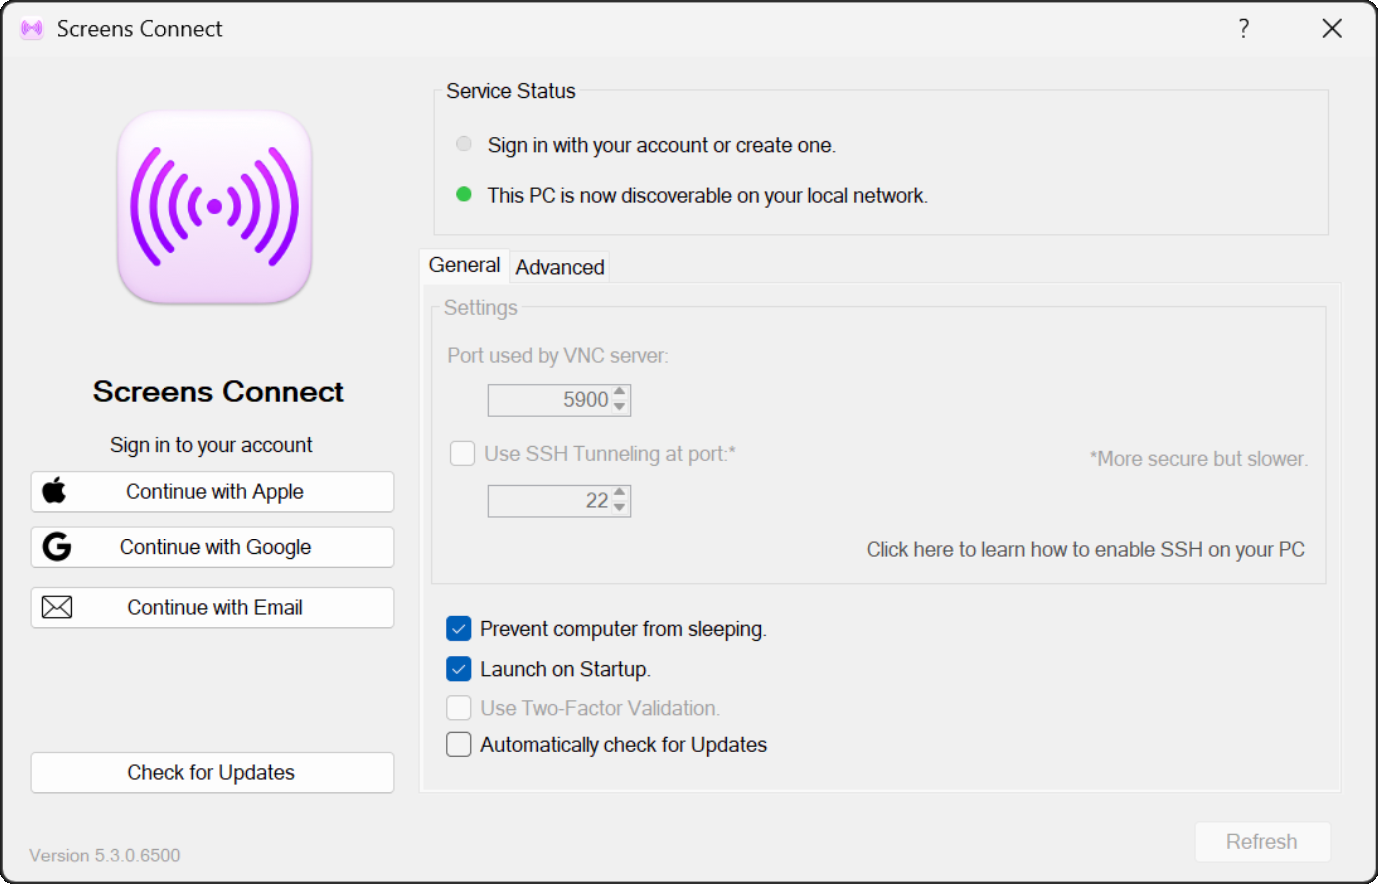
Sign in or sign up with Apple, Google or your email address.
General Configuration
To prevent disconnections caused by the PC going to sleep to save power, enable Prevent computer from sleeping.
Ensure that Launch on Start-Up is enabled.
Secure Connections
In order to enable secure connections (SSH), you'll need to install a SSH server on your PC. Please consult this article to learn how to enable SSH on your Windows PC.
If you wish to connect to this PC through an encrypted connection, enable Use SSH Tunneling at port.
Leave the port set at the industry-wide default of 22.
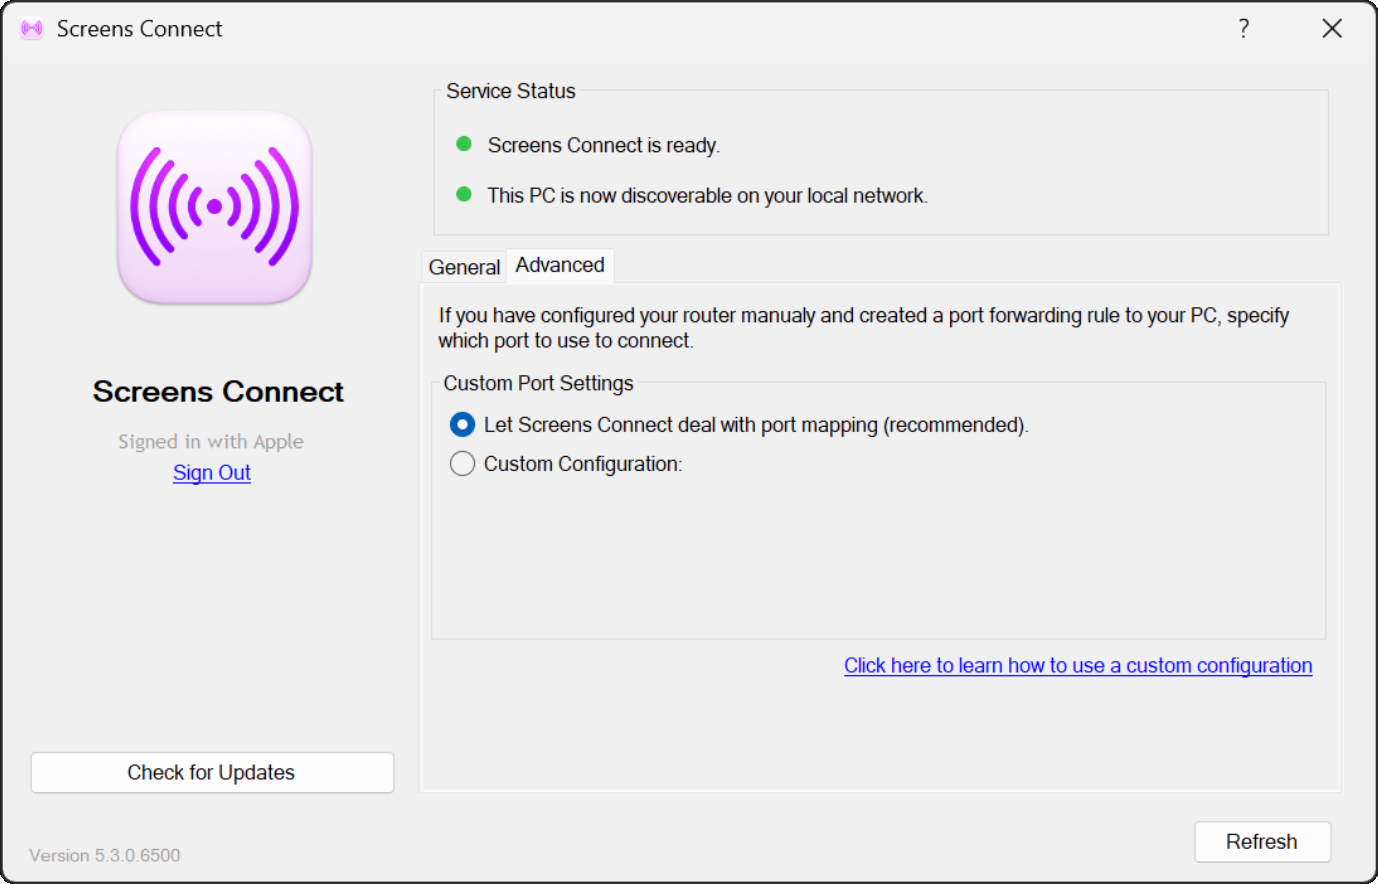
Advanced Configuration
If port mapping is not available on your router or prefer to manage port forwarding rules yourself, you can consult this article to learn how to configure Screens Connect manually.
Step 3: Signing in with your Screens Connect Account within Screens
Your Screens Connect Account is what links your computers where Screens Connect is installed and Screens. You need to sign in with your Account within the app in order for it to be able to contact our Screens Connect server and retrieve information necessary to connect back to your computers remotely.
Step 4: Establishing and Testing a Connection
With Screens Connect installed and set up, you’re ready to launch Screens 5 and connect to your computer. Before relying on remote access, we highly recommend testing your connection to ensure everything works as expected before leaving your PC unattended.
How to Test Your Remote Connection
- On your iPhone, turn off Wi-Fi.
- If you're using a Mac, iPad, or another device without mobile connectivity, connect it to your iPhone's personal hotspot to simulate a remote connection.
- Open Screens 5.
- Go to the Screens Connect section.
- If you're not already signed in, please do so.
- Select your PC to initiate a connection.
If the connection is successful, your remote set-up is ready to go! For more details on establishing a connection, refer to this article.
Uninstalling Screens Connect for Windows
To uninstall Screens Connect from your PC:
- Right-click the Screens Connect icon in the system tray.
- Select Exit.
- Open the Windows Control Panel.
- Click Uninstall a program.
- Select Screens Connect.
- Click Uninstall.
- Perform the same steps for TightVNC if you want to uninstall as well.