There are several ways to connect to a computer with Screens, depending on your set-up and needs.
For most users, we recommend using either:
- Screens Connect for the easiest local and remote access experience
- Tailscale if you already use it or need support for Linux or more advanced networks
Connection Methods
Connect with Screens Connect
Screens Connect is the easiest way to access your Mac or Windows PC from anywhere.
Once installed on your computer, Screens Connect automatically handles local and remote connectivity for you.
Sign In to Your Screens Connect Account
Your Screens Connect Account links Screens to your computers.
Sign in or sign up with Apple, Google or your email address:
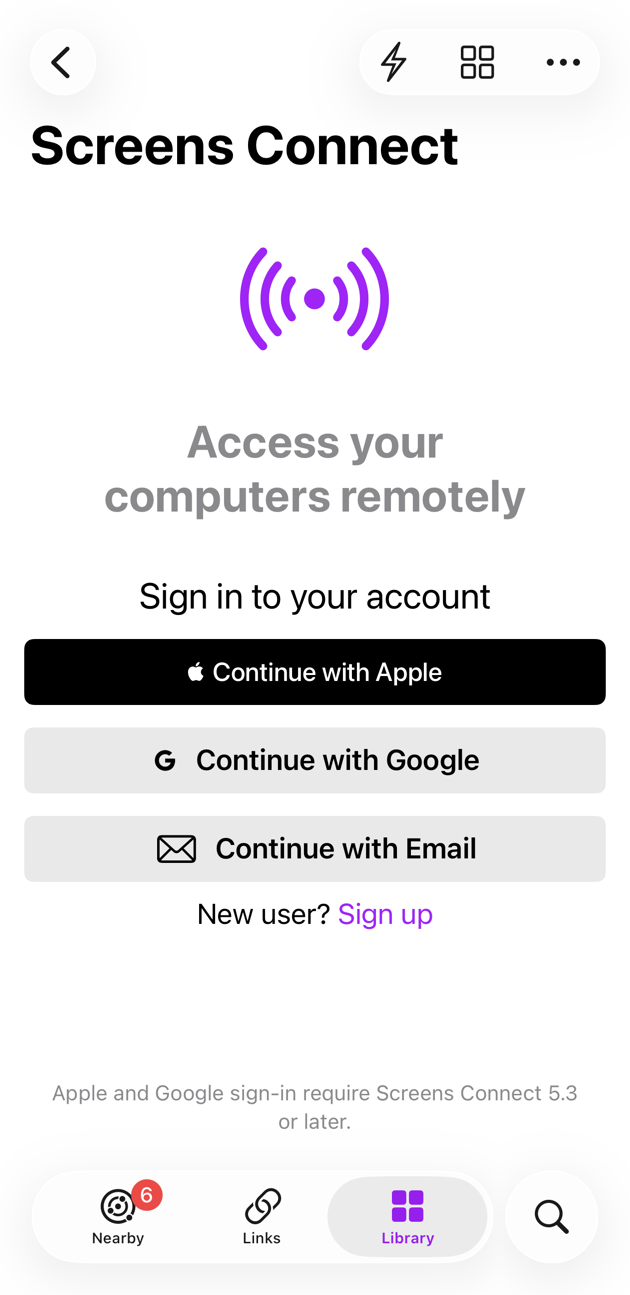
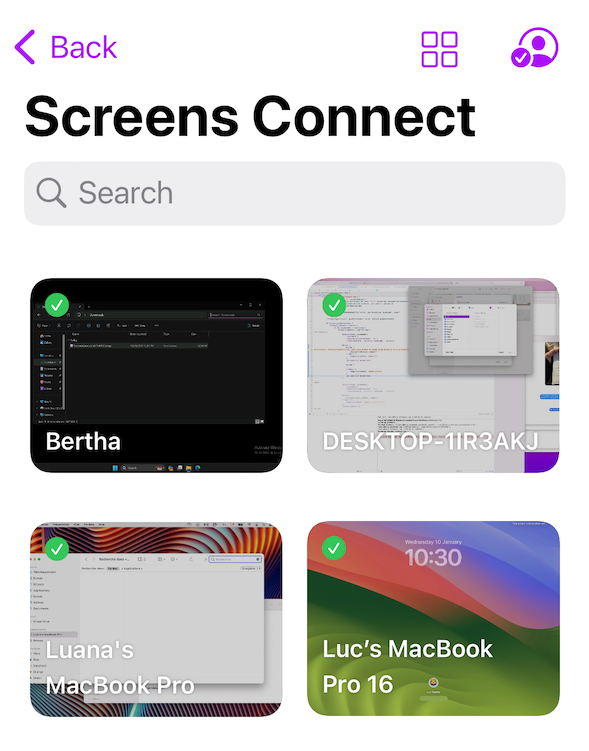
Once signed in, your available computers will automatically appear.
To start a connection:
- Tap a computer on iPhone, iPad, or Vision Pro
- Double-click a computer on Mac
Remove a Computer
To remove a computer from the list:
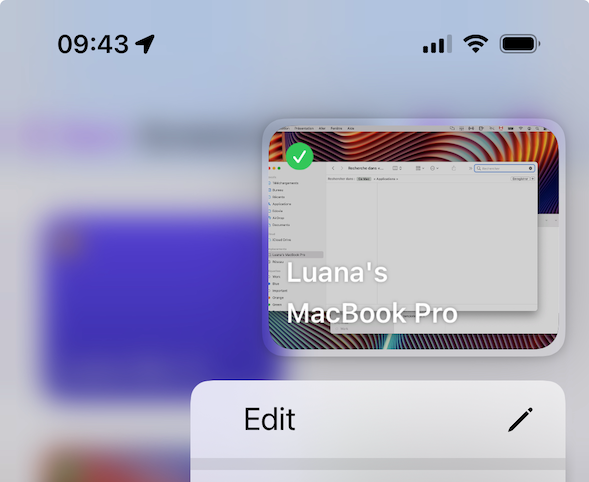
- Press and hold it on iPhone, iPad, or Vision Pro
- Right-click it on Mac
Then choose Unregister.
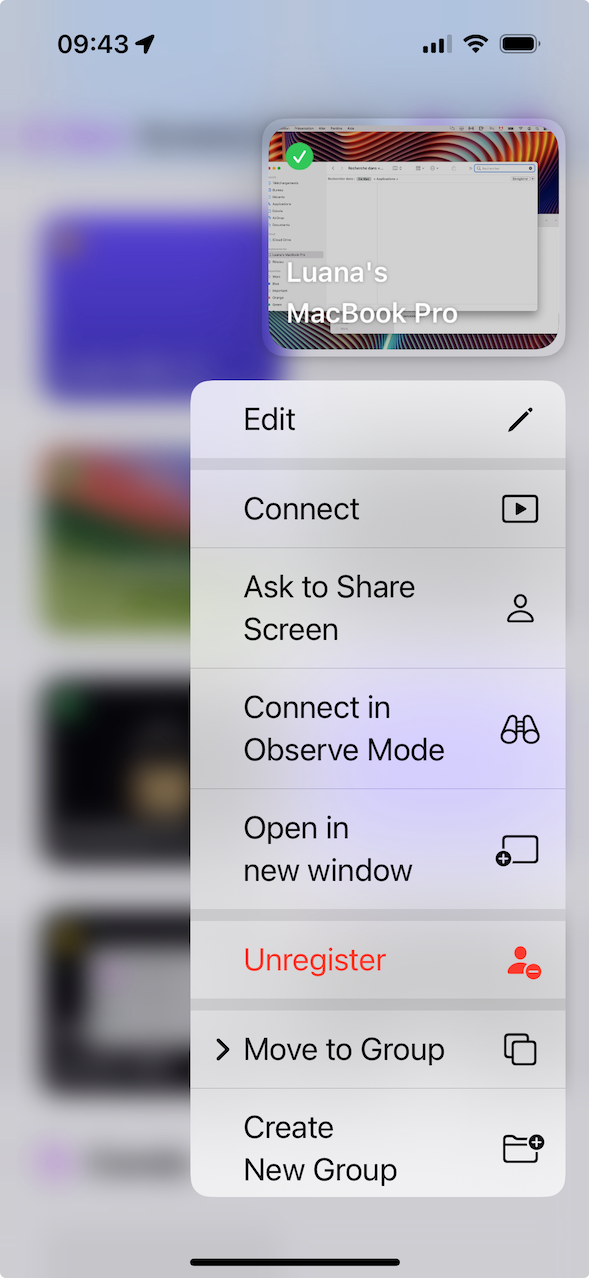
Important:
Unregistering a computer will remove its remote access configuration. You'll need to sign in again on that computer to restore remote access.
Connect with Tailscale
Tailscale is a secure mesh VPN service that works especially well on networks where traditional remote access methods may not work properly.
Tailscale can also be used with:
- Linux
- Raspberry Pi
- VPN-connected networks
- Carrier-Grade NAT (CGNAT)
Once linked to Screens, your Tailscale devices automatically appear in the app.
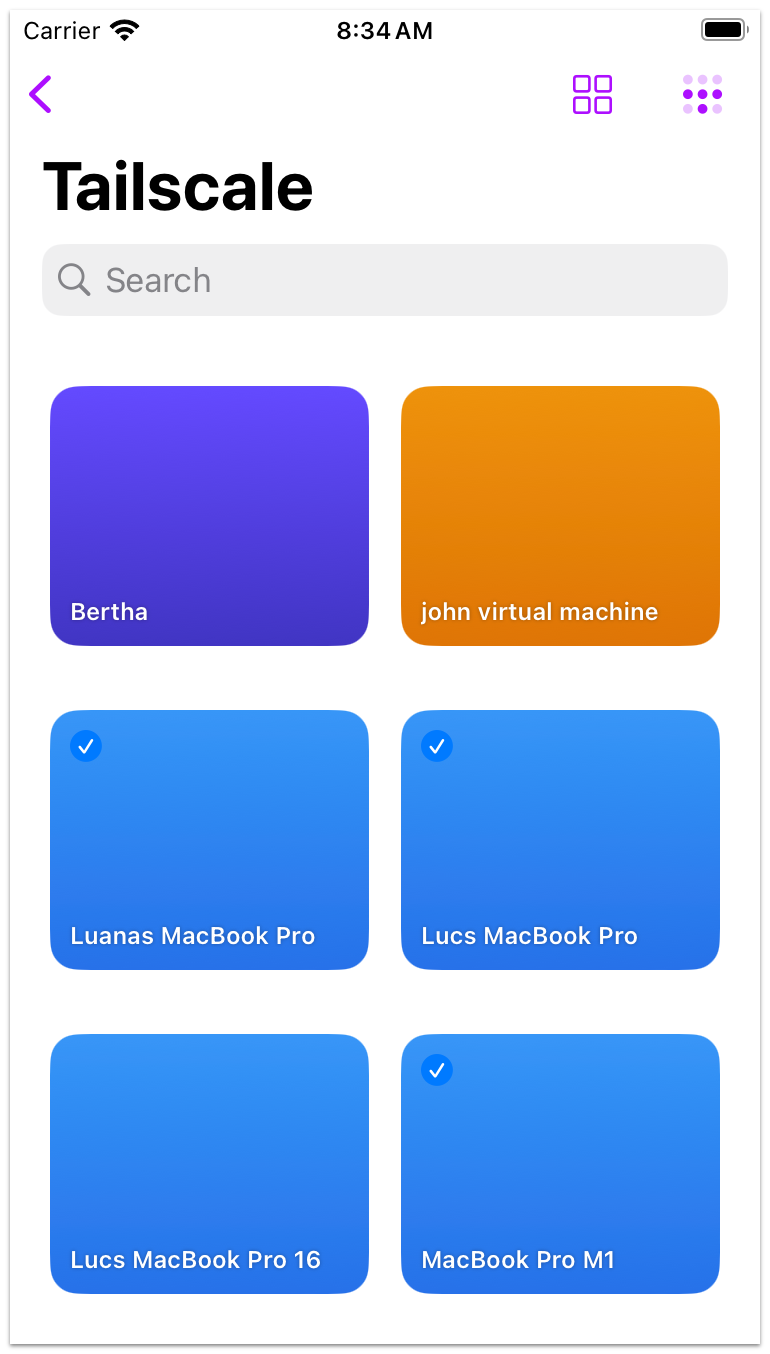
To connect:
- Tap a computer on iPhone, iPad, or Vision Pro
- Double-click a computer on Mac
You can also:
- Press and hold a computer on iPhone, iPad, or Vision Pro
- Right-click a computer on Mac
to edit it or access additional connection options.
You can create a free Tailscale account here.
For set-up instructions, refer to this article.
Connect to a Nearby Computer
The Nearby section displays computers available on your local network.
Screens automatically detects:
- Macs with Screen Sharing or Remote Management enabled
- PCs running a compatible VNC server and Screens Connect
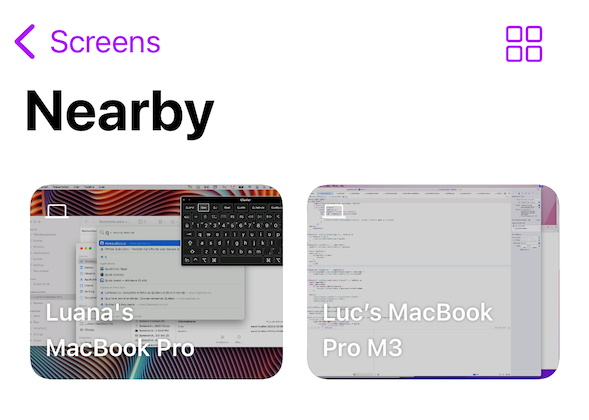
To connect:
- Tap a computer on iPhone, iPad, or Vision Pro
- Double-click a computer on Mac
You can also press and hold (or right-click) a computer to edit it or access additional options.
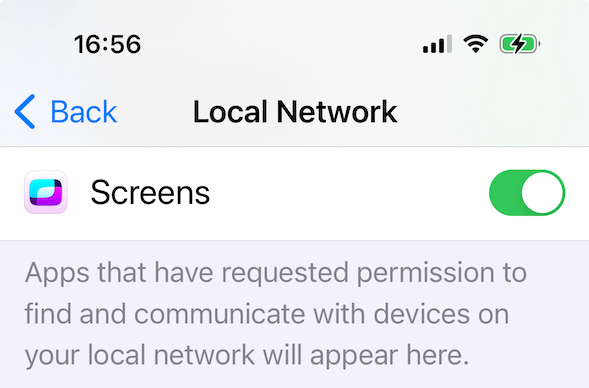
Allow Local Network Access (iPhone, iPad, Vision Pro)
Screens needs permission to detect devices on your local network.
- Open the Settings app
- Go to Privacy & Security > Local Network
- Make sure Screens is enabled
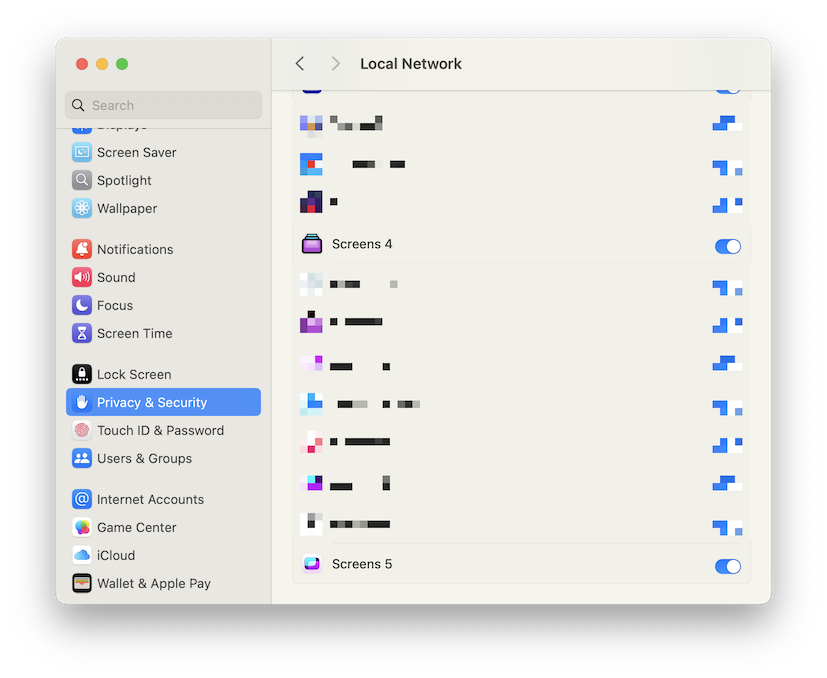
Allow Local Network Access (Mac)
Starting with macOS 15 Sequoia, apps must be authorized to detect devices on your local network.
- Open the System Settings app
- Go to Privacy & Security > Local Network
- Make sure Screens is enabled
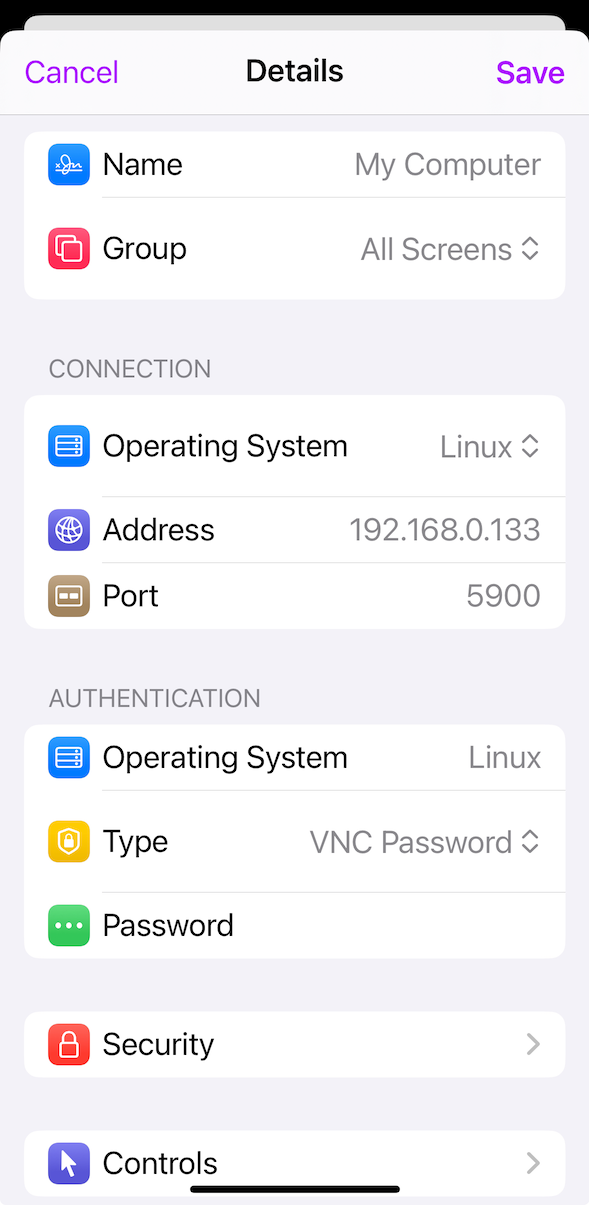
Create a Custom Connection
Custom connections are useful when:
- You don't use Screens Connect
- You want to connect using an IP address or hostname
- The computer doesn't appear in Nearby
- You need advanced configuration options
To create a custom connection:
- Select All Screens or a Group
- Click the button in the toolbar or press ⌘N
- Enter the connection information
- Optionally configure:
- Secure connections (SSH)
- Custom controls
- Additional connection settings
- Click Save
To connect:
- Tap the saved connection on iPhone, iPad, or Vision Pro
- Double-click it on Mac
Connect Using Quick Connect or a URL
Quick Connect lets you quickly connect by entering or pasting a URL.
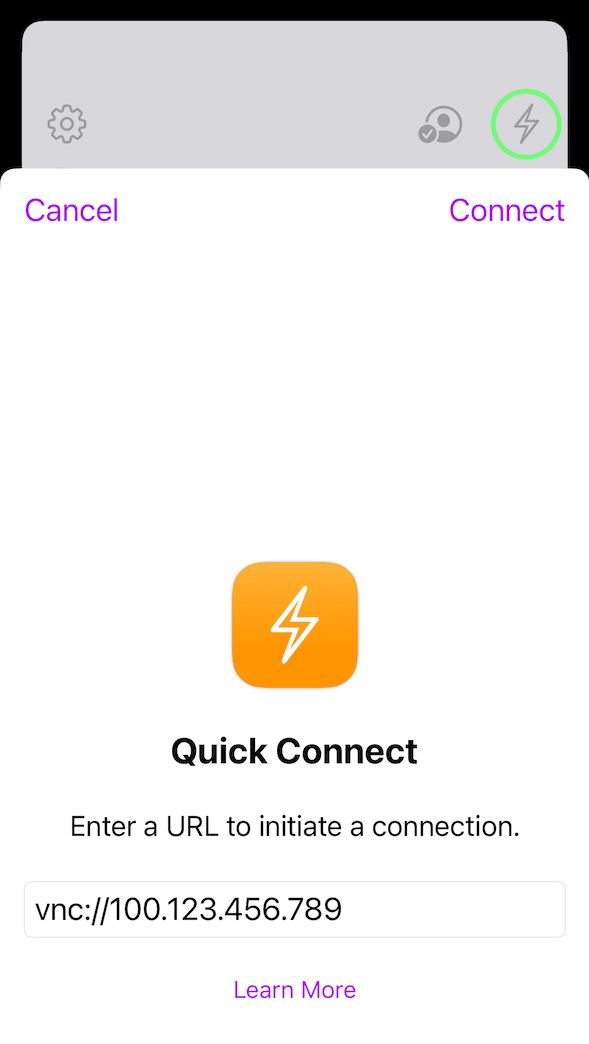
You can also tap or click supported Screens URLs outside the app to automatically launch Screens and start a connection.
For more information, refer to the URL Schemes article.
Links
The Links section contains temporary or shared connections created using:
To connect:
- Tap a link on iPhone, iPad, or Vision Pro
- Double-click it on Mac
Edit a Connection
To edit a saved connection:
- Press and hold it on iPhone, iPad, or Vision Pro
- Right-click it on Mac
Then choose the desired option from the menu.