If your router lacks UPnP support, or if your Mac is situated behind a Carrier Grade NAT, yet you wish to continue relying on Screens Connect, we suggest opting for Tailscale—a versatile, free-for-personal-use solution compatible with various major platforms. Please note that Tailscale requires macOS 11 or later.
If you prefer to use port forwarding, you'll find instructions below.
Note: Before proceeding, ensure that Remote Management is enabled on your Mac. You'll find with detailed instructions in this article.
Using Tailscale
Step 1: Install Tailscale
If you don't have one already, create a Tailscale account.
On the Mac you'll be connecting to, follow these instructions from Tailscale.
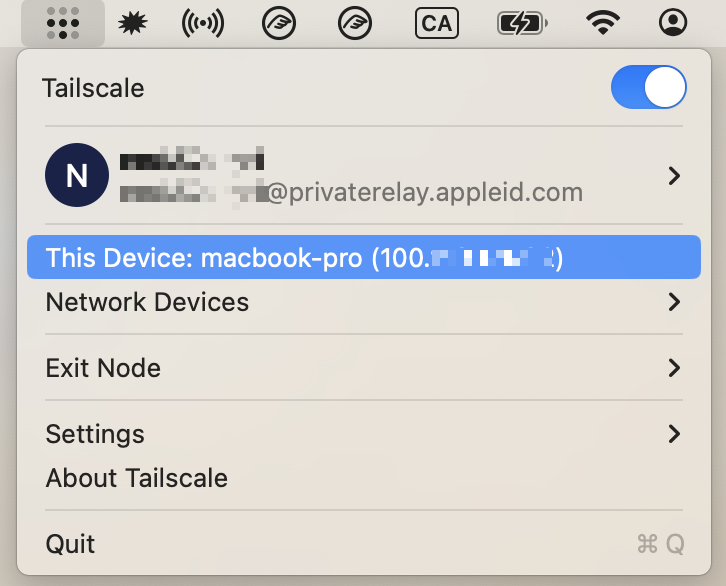
Once Tailscale is installed and enabled, locate the IP address starting with 100. for your computer in the Tailscale system menu:
Step 2: Configure Screens Connect
- Open Screens Connect 5 from its system menu icon.
- Click Preferences…
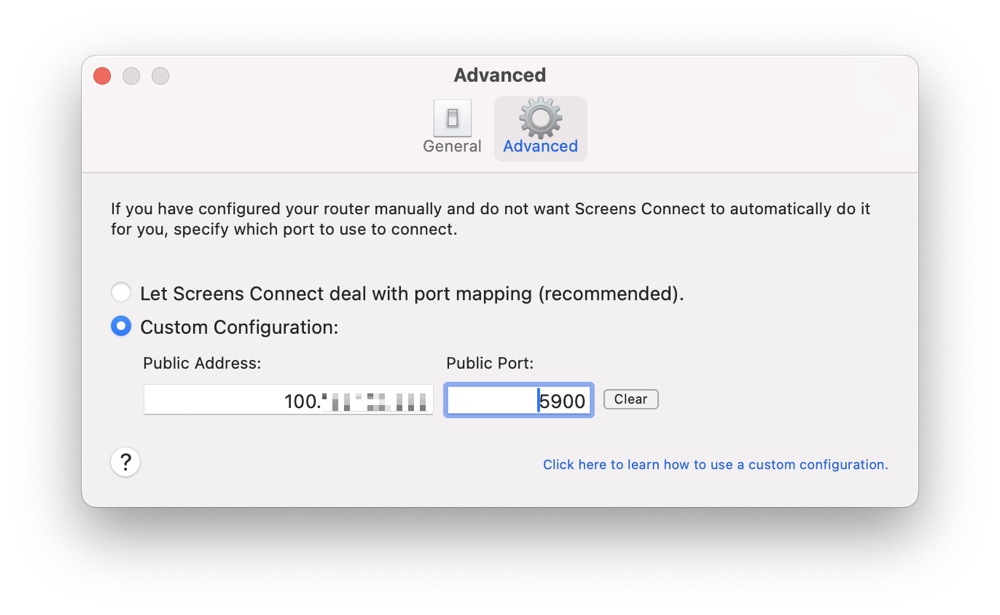
- Click Advanced.
- Select Custom Configuration.
- Enter the IP address from Tailscale (starting with 100.) for your Mac and use either port 5900 or 22 (if secure connections are enabled).
- Close the window to apply the changes.
With Tailscale and Screens Connect configured, you should now be able to seamlessly connect to your Mac from anywhere using Screens.
Step 3: Install Tailscale on your source devices
Make sure Tailscale is installed and connected with the same Tailscale user on the Mac, iPhone, iPad, or Vision Pro you're using to connect, or you won't be able to access the computer.
Instructions from Tailscale can be found here: Mac, iPhone, iPad, Vision Pro.
Troubleshooting
If you encounter any issues with your Tailscale configuration, we recommend referring to this Tailscale troubleshooting article for comprehensive assistance.
Using port forwarding
Step 1: Set a Static IP address
If your Mac already uses a static IP address, you can skip to Step 2.
Click this link to open the System Settings on your Mac.
Like your public IP address, your local IP address may change from time to time. We need to make sure it stays the same.
Click this link top open network settings on your Mac.
Browse to Network
Select the current network and click Details…
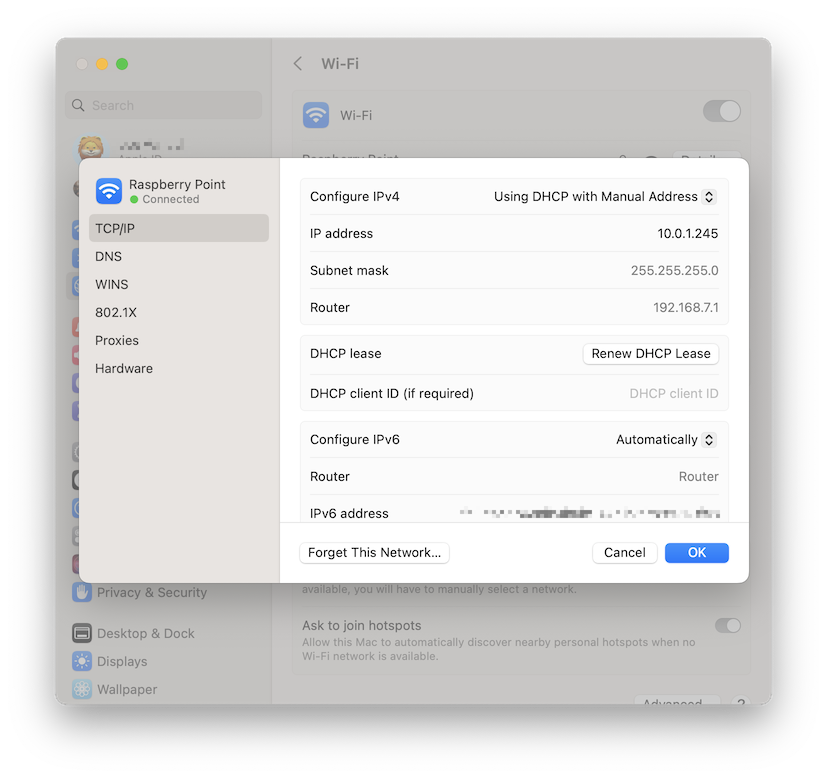
Select TCP/IP
Under Configure IPv4, select Using DHCP with manual address.
Select a static IP that will not conflict with anything else on the network. It’s best to pick a number far out of the normal range of assigned IP’s, in the example below we chose 10.0.1.245 because most of the machines on this network stop at 10.0.1.150. Check your router's IP address to know which range to use.
Click OK or Apply
Your IP will now be set to the static address you provided. Note that you will briefly disconnect from the network while this occurs.
Note: Instructions for macOS 12 or earlier are available here.
Step 2: Manually Configuring Your Router's Port Forwarding Feature
This method will differ from one router to another, so we strongly suggest referring to the port forwarding guide at Port Forward. This guide includes detailed instructions for many router brands and models.
Here's how to proceed:
- Go to portforward.com.
- Click on Port Lists.
- Scroll down, click "V" and search for VNC or click "S" to search for SSH if you wish to use a secure connection.
- Select the brand of your router (ex: Arris).
- If you see an ad, simply click Close [x]. You don't need to purchase anything from Port Forward.
- Select the router model (ex: BGW210-700).
- Follow the instructions.
- Remember the public port number you have used for your port forwarding rule as you will need it in Step 3.
For example, your port forwarding rule could use public port 4982, which will redirect to the IP address configured in Step 1 and to either port 5900 (VNC) or 22 (SSH), depending on which service you chose above.
You can also find port forwarding instructions for these popular routers:
We will add more instructions in the future.
Step 3: Configure Screens Connect
Open the Screens Connect preferences from the icon in the system menu bar.
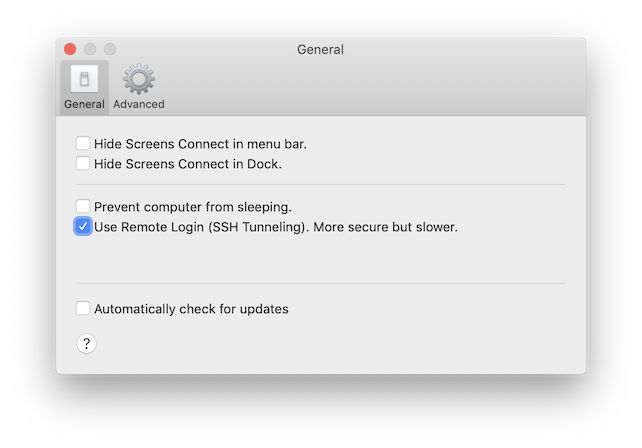
If you have created a port forwarding rule for SSH, make sure to enable Use Remote Login under the General tab. Keep this option disabled if you have created a port forwarding rule for VNC.
Select the Advanced tab and enable Custom Configuration.
If you have created a port forwarding rule for SSH, enter the public port number you have chose. In our example, we used 2299.
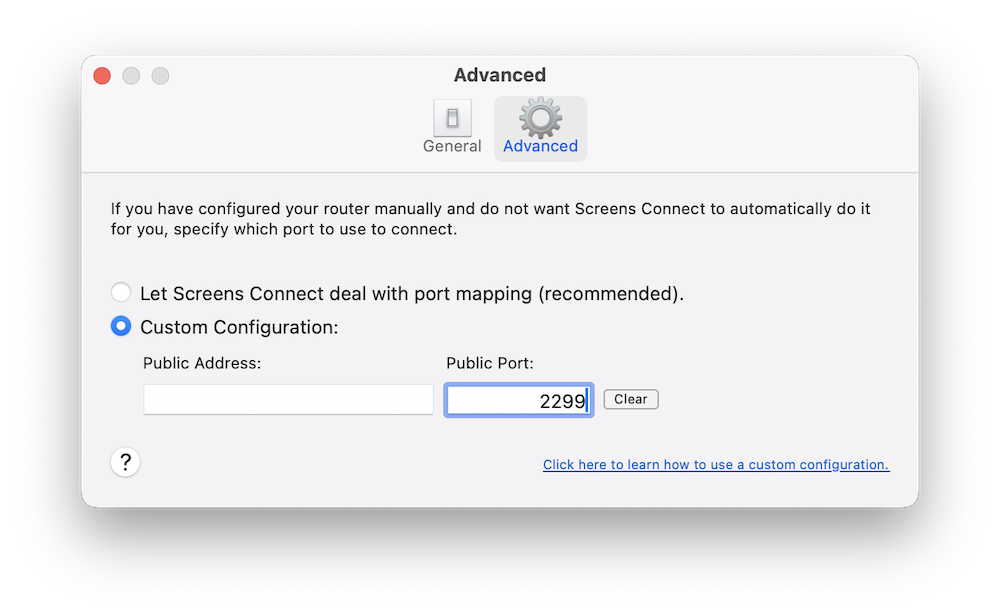
Leave the public IP address field empty.
If you have created a port forwarding rule for VNC, enter the public port number you have chose instead.
You can now close the Preferences window. Screens Connect will update its status with our server and use that information from now on.
Use one port per Mac
If you need to manually configure port forwarding for multiple Macs, note that each of those computers requires its own dedicated port number. For example:
- Luana's Mac > Public port 59107 redirecting to port 5900
- Luc's Mac > Public port 59108 redirecting to port 5900
- and so on ...
Testing your configuration
In order to ensure that your port forwarding rule is configured properly, you can try to connect from a different wi-fi network or a cellular network.
We recommend connecting from your iOS device via a cellular network (3G, LTE, etc.). If you wish to test your connection from your Mac, you can do so from another wi-fi network or by using your iOS device as a personal hotspot.
If Screens is able to connect, then you should be all set!
Other Considerations
- If there is a firewall or some security setting on your router, ensure that it is configured to let incoming connections to go through.
- Make sure to configure your Mac to wake for network access.