You can securely connect to your Mac using SSH keys with Screens 5. This guide walks you through generating an SSH key, configuring your Mac, and setting up the key in Screens.
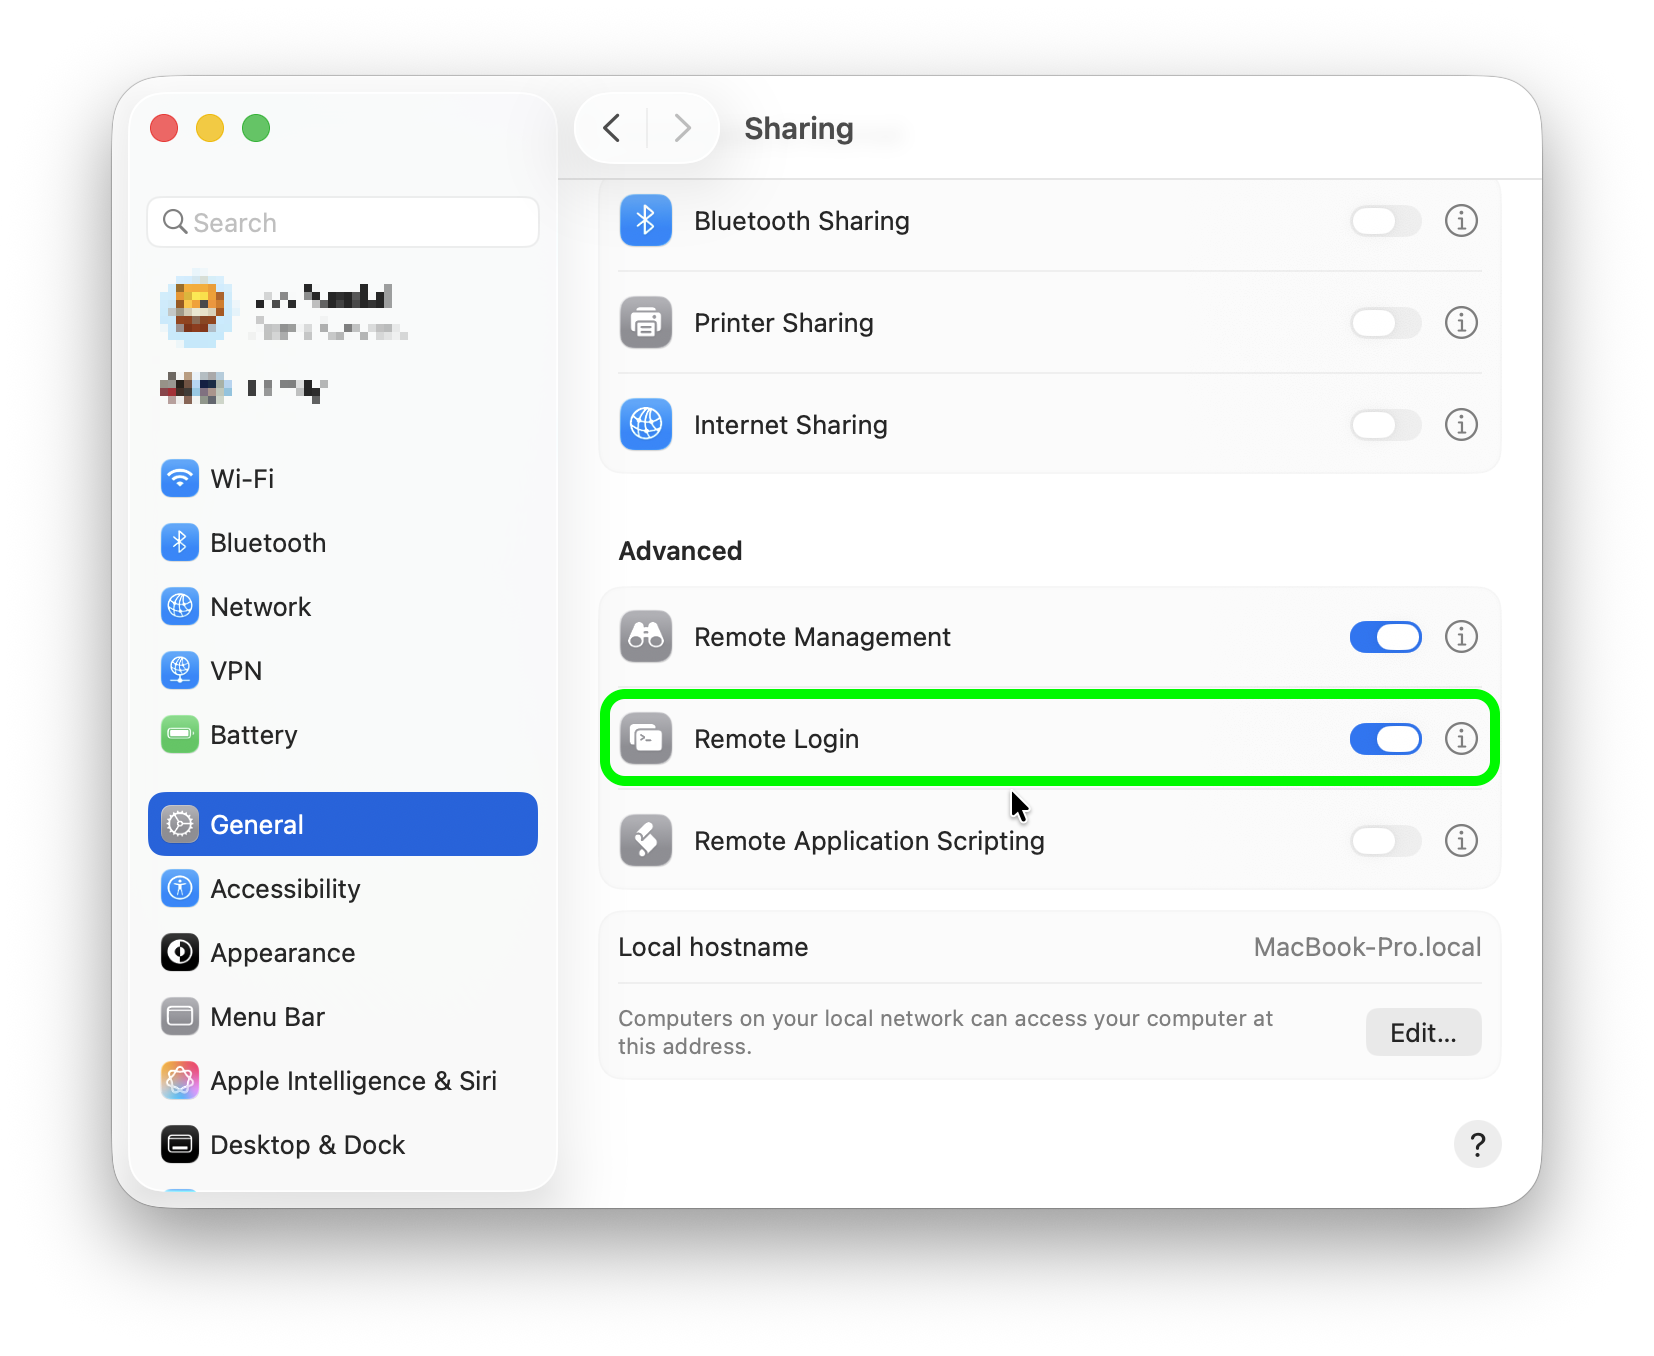
Important: Make sure Remote Login is enabled on your Mac. Open the Settings app and go to General > Sharing, then enable Remote Login.
Step 1: Generate an SSH Key Pair
- Open the Terminal app on the destination Mac (the one you want to connect to).
- Navigate to your home folder:
cd ~ - Generate a new SSH key pair:
ssh-keygen -t ed25519 -b 4096 -C "your@email.com" -f MyKey- Replace MyKey with your preferred key name (avoid spaces).
- When prompted, enter a passphrase for added security or press Return to leave it blank.
This will generate two files:
- ~/MyKey (your private key)
- ~/MyKey.pub (your public key)
Step 2: Authorize the Public Key on the Destination Mac
To allow SSH access using your new key:
- Append your public key to the list of authorized keys by running:
cat ~/MyKey.pub >> ~/.ssh/authorized_keys- If the ~/.ssh folder doesn’t exist, you may need to create it first:
mkdir -p ~/.ssh && chmod 700 ~/.ssh
- If the ~/.ssh folder doesn’t exist, you may need to create it first:
- Ensure the permissions are set correctly:
chmod 600 ~/.ssh/authorized_keys
Step 3: Import the Private Key into Screens
If you're using Screens 5 on your Mac, launch the app and follow this guide to import the private key into Screens and start using it. Screens syncs keys using iCloud Keychain, so the key will also be available on your other devices running Screens.
Alternatively, you can manually transfer the private key file ('~/MyKey') to another device using AirDrop, iCloud Drive, email, or any secure method. Then, follow this guide to import the private key into Screens and start using it.