Please note that Screens 4 is no longer available and has been replaced by Screens 5, a universal app for iPhone, iPad, Mac, and Vision Pro.
Before we begin, make sure that you've configured the computer you'll be connecting to for remote access. You'll find related instructions in this section.
Instructions for Screens on macOS
Instructions for Screens on iOS
Create a new connection in Screens for macOS
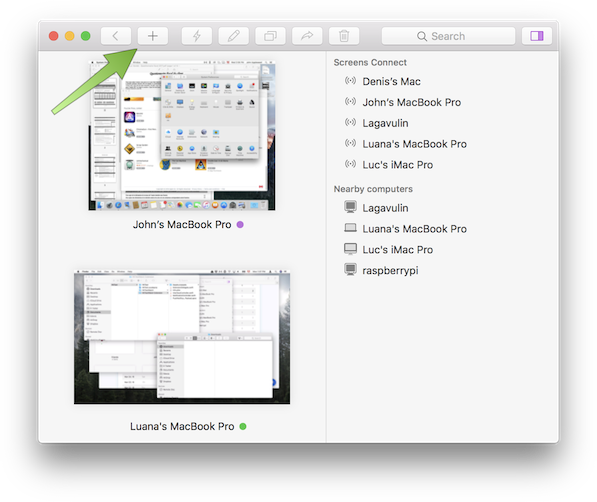
In the Screens toolbar on your Mac, click the button and select New Screen:
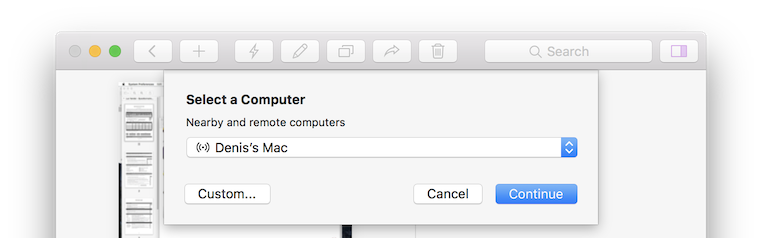
In the drop-down menu, select the computer you wish to connect to and hit Continue:
If the computer you wish to connect to is not in the list, make sure that:
- Your computer is configured for remote access
- You are signed in with your Screens ID if you have installed Screens Connect on your computer
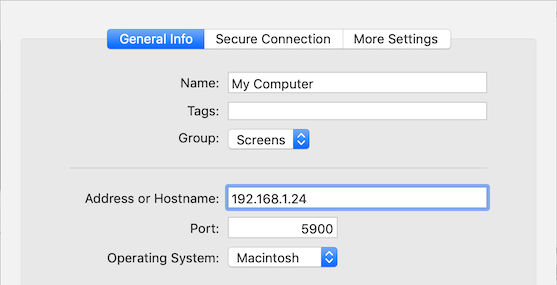
If this doesn't apply or you wish to use a custom IP address or URL scheme, click Custom... to create a new screen manually.
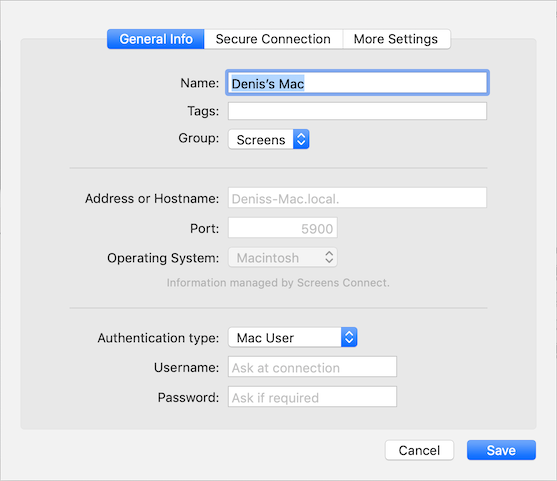
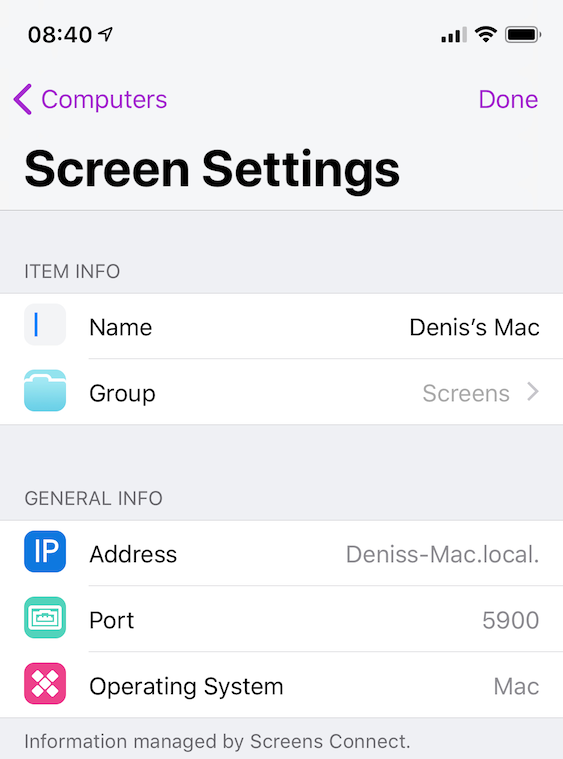
When you select a computer from the list, Screens will fill out the address and port fields automatically. If Screens Connect is installed on that computer, that information cannot be changed as it will be managed by Screens Connect.
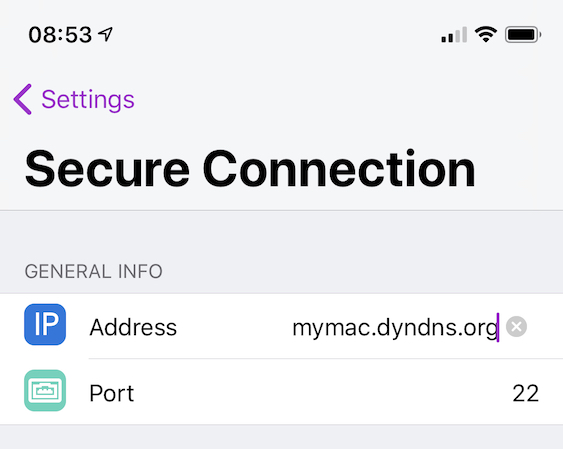
If you chose to create a custom screen, you can enter a:
- Public or private IP address
- A custom URL (ex: mymac.dyndns.org)
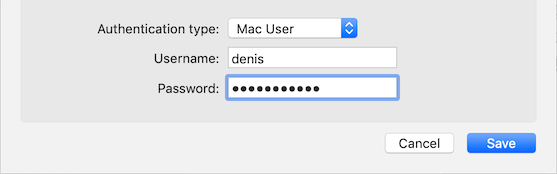
Select the appropriate Authentication Type:
- Mac
- Mac User (recommended)
- Mac Guest User (see Sharing a Mac Session)
- VNC password (only recommended for older OS X versions)
- Windows, Linux, Raspberry Pi, Other
- VNC password
- None (not recommended)
Depending on the selected authentication method, enter the remote user account's username and password for Mac User (see Authentication with Screens) or the VNC password set in the VNC server settings on your PC.
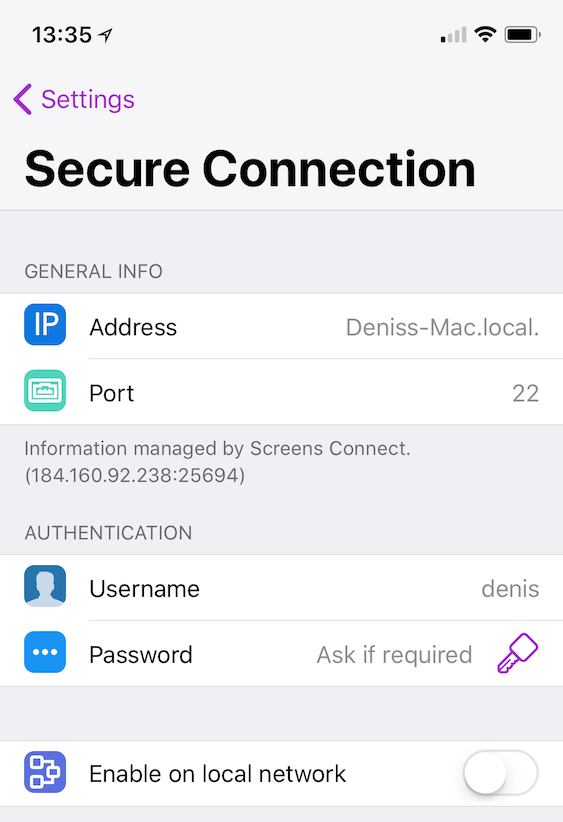
If the remote computer is configured for secure connections, click the Secure Connection tab and activate Enable Secure Connections. Enter the Remote Login (SSH) user account's username and password or leave empty to use the username/password from the General Info section.
You may also select a SSH key here instead of entering a username/password pair.
Note: If you're creating a custom screen and enable secure connections, make sure that you're using your custom IP address or URL in the Secure Connection section.
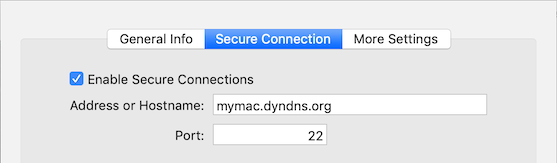
Please consult Using custom URLs and ports with Screens for more information.
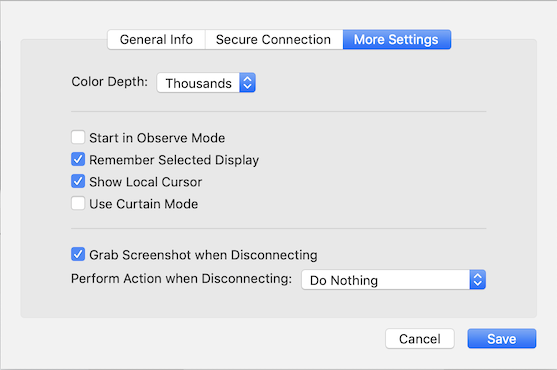
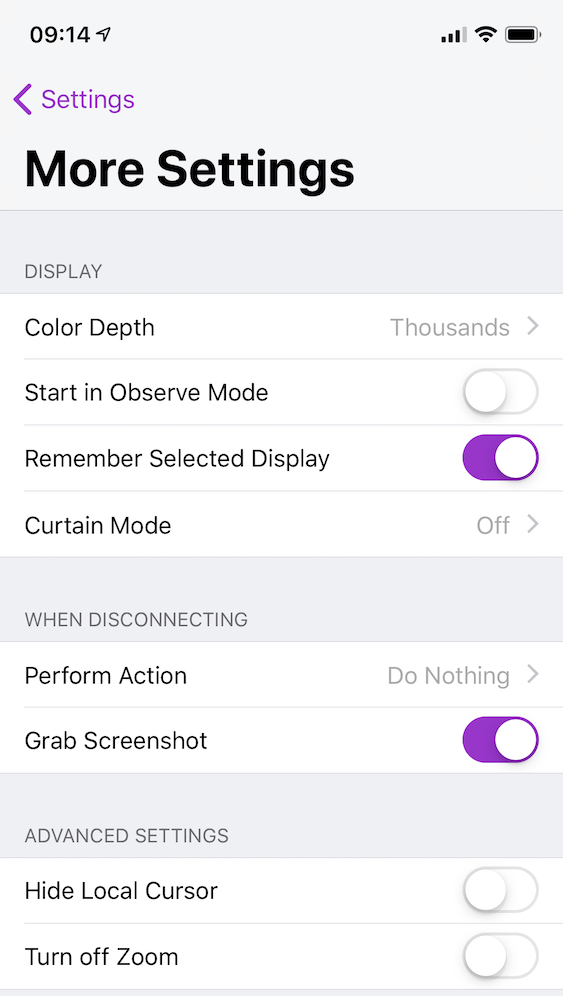
Click More Settings and make adjustments as appropriate for your needs.
Click Save.
Double-click on your newly created screen to connect.
Create a new connection in Screens for iOS
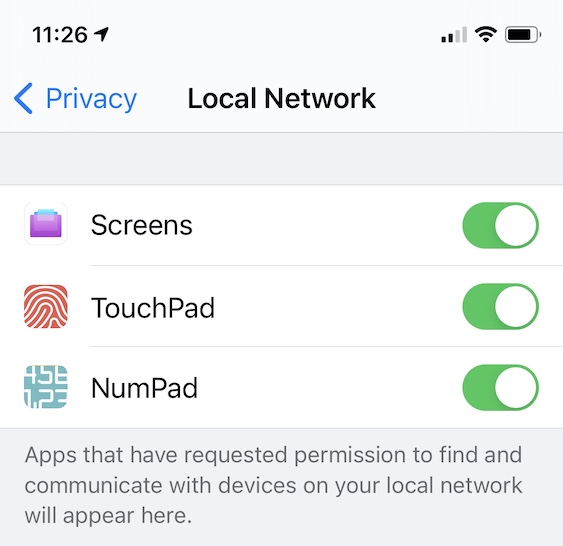
Important: Make sure that Screens is allowed to access your local network. To make sure it is, open the Settings app and browse to Privacy > Local Network. Screens should be allowed. If not, simply turn on access.
From Screens on your iOS device, tap the button in the upper-right corner of the display and tap New Screen.
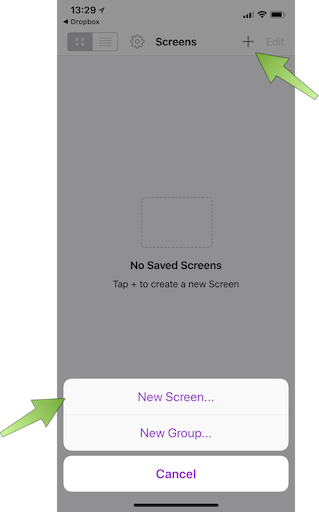
A list of every computer available on your local network or via Screens Connect will appear. Tap the computer you'd like to create a new saved screen for:

If the computer you wish to connect to is not in the list, make sure that:
- Your computer is configured for remote access
- You are signed in with your Screens ID if you have installed Screens Connect on your computer
If this doesn't apply or you wish to use a custom IP address or URL scheme, click Custom... to create a new screen manually.
When you select a computer from the list, Screens will fill out the address and port fields automatically. If Screens Connect is installed on that computer, that information cannot be changed as it will be managed by Screens Connect.
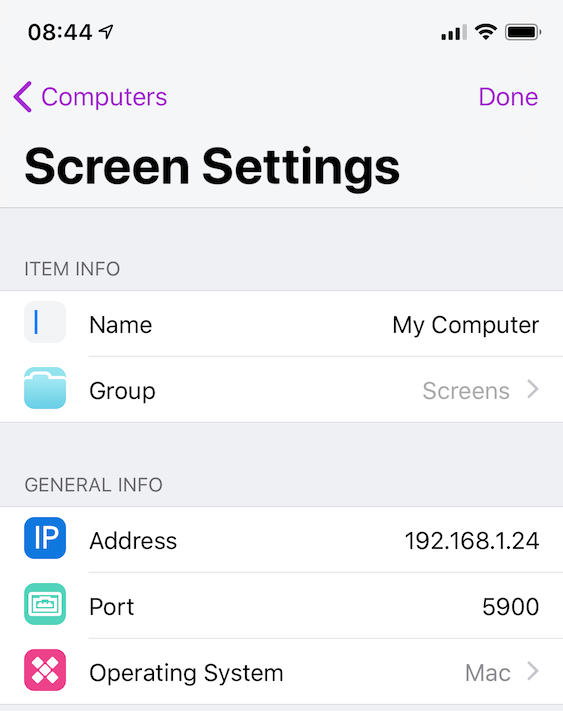
If you chose to create a custom screen, you can enter a:
- Public or private IP address
- A custom URL (ex: mymac.dyndns.org)
Select the appropriate Authentication Type:
- Mac
- Mac User (recommended)
- Mac Guest User (see Sharing a Mac Session)
- VNC password (only recommended for older OS X versions)
- Windows, Linux, Raspberry Pi, Other
- VNC password
- None (not recommended)
Depending on the selected authentication method, enter the remote user account's username and password for Mac User (see Authentication with Screens) or the VNC password set in the VNC server settings on your PC.
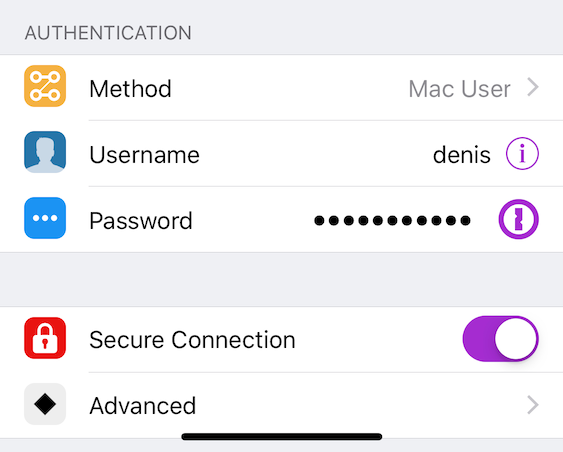
If the remote computer is prepared for secure connections, enable Secure Connection. Tap Advanced and enter the Remote Login (SSH) user account's username and password or leave empty to use the username/password from the General Info section.
You may also select a SSH key here instead of entering a username/password pair.
Note: If you're creating a custom screen and enable secure connections, make sure that you're using your custom IP address or URL in the Secure Connection section.
Please consult Using custom URLs and ports with Screens for more information.
In the upper-left corner of the display, tap Settings.
Tap More Settings and make adjustments as appropriate for your needs.
In the upper-left corner of the display, tap Settings.
In the upper-right corner of the display, tap Done.
Tap your newly created screen to connect.
Considerations
Detecting local computers via Bonjour
In order for Screens to detect a computer on the same network, it requires that the computer is broadcasting its presence via the Bonjour protocol.
By default, macOS supports this and most Linux distributions do as well. As for Windows, we recommend installing Screens Connect, which enables Bonjour on Windows. For Raspberry Pi, you can follow these instructions to enable Bonjour.