To connect via a secure connection, you need to prepare your Windows PC and install a SSH server.
Note: Before proceeding, make sure that your Windows installation is up to date.
Windows 10
Since Windows 10, Microsoft offers OpenSSH as an optional installation. This makes things much easier but there are a few steps to go through in order to install the server.
For earlier Windows versions, make sure that a SSH server such as freeSSHd is installed.
Instructions for Windows 10 and later
Start a powershell prompt as administrator and execute the following command to see if it's installed already:
Get-WindowsCapability -Online | ? Name -like 'OpenSSH*'You should see something like:
Name  : OpenSSH.Client~~~~0.0.1.0
State : NotPresent
Name  : OpenSSH.Server~~~~0.0.1.0
State : NotPresent
The client part is not required. If the server part is NotPresent, install it with this command:
Add-WindowsCapability -Online -Name OpenSSH.Server~~~~0.0.1.0You should see something like:
Path          :
Online        : True
RestartNeeded : False
Start the OpenSSH server and make sure it starts up automatically.
Start-Service sshd
Set-Service -Name sshd -StartupType 'Automatic'
Verify or Fix the Firewall Rule
The setup usually creates a firewall rule to allow OpenSSH, but it may only apply to private networks. To ensure the rule is valid and works regardless of the network type (Public or Private), run:
Set-NetFirewallRule -DisplayName "OpenSSH SSH Server (sshd)" -Profile AnyYou can confirm the rule exists and is enabled with:
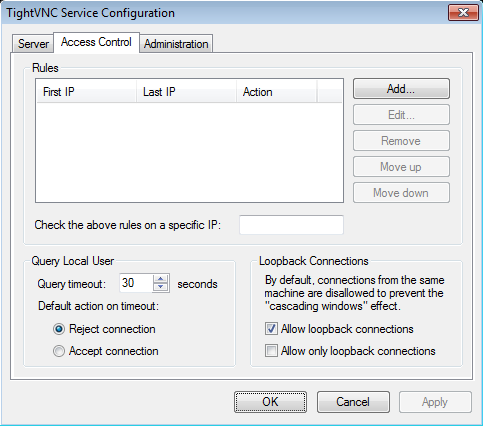
Get-NetFirewallRule -DisplayName "OpenSSH SSH Server (sshd)"Loopback Connections
Open the settings for the VNC server installed on your PC and make sure that loopback connections are enabled:
Enable Secure Connections in Screens Connect
Now that your PC is configured, you can enable secure connections in Screens Connect.